- Welcome to the Etsy Community
- Etsy Teams
- Love Handmade
- Forum
- [A] - How to insert a photo [B] - How to create a ...
- Subscribe to RSS Feed
- Mark Topic as New
- Mark Topic as Read
- Pin this Topic for Current User
- Bookmark
- Subscribe
- Printer Friendly Page
- Mark as New
- Bookmark
- Subscribe
- Subscribe to RSS Feed
- Permalink
- Report Inappropriate Content
[A] - How to insert a photo [B] - How to create a link [C] - How to combine a photo + link
[A] - How to insert a photo
For example, to copy a photo from my Etsy shop, to this Reply window:
- In my shop, I right-clicked on the image that I wanted to copy (in this case 1 of 4 photos at the top of my home page).
- Then I left-clicked on Copy Image.
- Next, to insert the image in this Reply window, I left-clicked on Paste.
- Next, I left-clicked ON the image to reveal 4 handles, left-clicked on one and dragged it around to re-size the image.
- Finally, I clicked on Post.
Quick reminder: To insert a photo use Copy Image & Paste.

[B] - How to post a link
- I used Copy to grab the URL (in my case the URL is https://www.etsy.com/shop/boxcornerRon).
- Then I left-clicked on the chain-link icon above, called Insert/edit link. (The 5th icon from the left. NB - These icons are only displayed when this Reply box is in Create/Edit mode, not when it is in Display mode). Clicking on the Insert/edit link icon opens a window called Insert link.
- Next, I used Paste to insert the URL in the 1st field, at the top of the Insert link window.
- The 2nd field, called Text to display, is the text that will be displayed when you hover the mouse pointer over the image.
- The 3rd field is optional.
- I changed Target from Open in current page to Open in new page.
- Then, clicked on OK to insert the link in this window (see below).
- Finally, I clicked on Post.
Quick reminder: To insert an active link use Copy & Paste
https://www.etsy.com/shop/boxcornerRon
[C] - How to combine a photo + link
- *In my shop, I right-clicked on the image that I wanted to copy (in this case 1 of 4 photos at the top of my home page).
- *Then I left-clicked on Copy Image.
- *Then, to insert the image in this reply window, I left-clicked on Paste.
- *Next, I left-clicked ON the image to reveal 4 handles, left-clicked on one and dragged it around to re-size the image.
- To make this image an active link, I returned to my home page and right-clicked on the image again, then left-clicked on Copy Link Location.
- Then left-clicked ON the image again to select it. IMPORTANT - The 4 handles must be visible.
- Then I left-clicked on the chain-link icon and left-clicked in the URL field to Paste the link location that I copied from my home page.
- Next, I deleted all characters to the right of the 9-character listing number, leaving just https://www.etsy.com/listing/673767852/ in the URL field.
- The 2nd field, called Text to display, is the text that will be displayed when you hover the mouse pointer over the image.
- The 3rd field is optional.
- In the bottom left-hand corner of the Insert link window there is a drop-down menu entitled Target. I changed this from the default Open in current page to Open in new page.
- Next, in the bottom right-hand corner of the window, I clicked on OK.
- NB - At this stage, the image does not appear to be a link. If you move your mouse pointer over it, it will just appear to be an image.
- Finally, I clicked on Post.
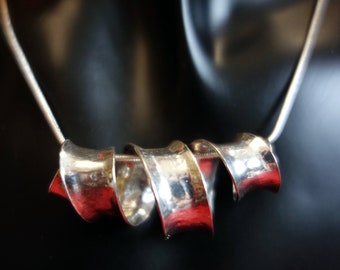
- Now the image below is an active link. Click on it and it should take you to the corresponding page in my shop.
Quick reminder: To create a combined photo & link use Copy Image & Paste to insert a photo, then use Copy Link Location, click on chain-link icon to open the Insert/edit link window, Paste the link in the URL field, delete all characters after the listing number, select Target to Open in new page, OK then Post.
NOTES
- These instructions might seem to be a bit long-winded, or maybe a bit daunting, but once you have done this a couple of times it becomes easier. You might find it easier if you practice doing [A] and [B], before you try to do [C].
- These instructions work for me, on my computer, using my web browser (Firefox). If your web browser and/or your operating system is different from mine (Linux) then these instructions might not work for you, or you might find that some of the menu options have different names. So, if you are using Chrome, not Firefox, or Windows/Mac not Linux, then some of the option names might be different. For example, you might find the Copy Link Location is called Copy Link. You might need to experiment a little.
- *The first 4 instructions in [C] are the same as [A].
- If you manage to get it working, but find differences that are specific to your browser or operating system, then please let me know, so I can amend these instructions to help other users with the same setup as yours. Please post any comments as a reply to these instructions.
- Frankly, I had difficulty getting [C] to work, then I noticed that Costa Sellinides had somehow achieved it. I asked for his help and he very kindly explained how he managed to achieve it, on his system. So, a huge thank you to Costa! Please visit his shop ArtDesignStudioCy
I hope you find this helpful ( ͡ᵔ ͜ʖ ͡ᵔ )
BTW - My browser is Mozilla Firefox, used on a laptop computer. My OS is Linux Kubuntu (a relative of Ubuntu).
Kind regards, Ron

